Shopify
Integrate Ledyer's B2B checkout solution with your Shopify store to offer flexible payment options specifically designed for business customers.
Prerequisites
Before you begin, ensure you have:
- Active Shopify store (we support all features starting from the Basic plan)
- Business customer focus - Ledyer is designed specifically for B2B transactions
Features and limitations
Supported Features
✅ Available with Ledyer:
- Company credit checks
- Invoice payments with extended terms (30 days)
- Fallback to advance invoice when credit is denied
- Multi-currency support
- Order lines and tax handling (VAT, sales tax)
- Order management and tracking
- Full order capture
- Full and partial refunds
- Order cancellation
❌ Not Available:
- B2C
- Partial capture (due to Shopify limitations)
Order creation from Shopify admin
If you want to create an order for your customer that will be paid with Ledyer, the easiest way is to create a draft order:
- Open your Shopify admin
- Go to Orders > Drafts
- Click
Create order - Add the products and (if you prefer) customer details
- Click
Send invoiceand type the email you want to receive the order.
After this has been done the chosen email address will receive an email from Shopify with a link to your stores checkout page. Your customer can now choose to pay with Ledyer or any other payment provider you have available.
Setup Steps
Step 1: Retrieve credentials for Ledyer payments
In this step, you will generate two important keys to connect the Ledyer Payments app to your Ledyer account
- Log in to Ledyer merchant portal.
- Inside the merchant portal you can click Settings > API credentials > Generate new > Choose
Full access, enter any name like "Ledyer payments for shopify" and pressGenerate. - Copy the generated ID and Secret and save them somewhere safe (if you lose them you can always generate new ones).
Step 2: Install Ledyer App
Visit Shopify App Store
- Go to Ledyer payments in Shopify
- Click "Add app" to install
Step 3: Configure Ledyer payments
It's now time to input your credentials from the previous step in your Ledyer Shopify App.
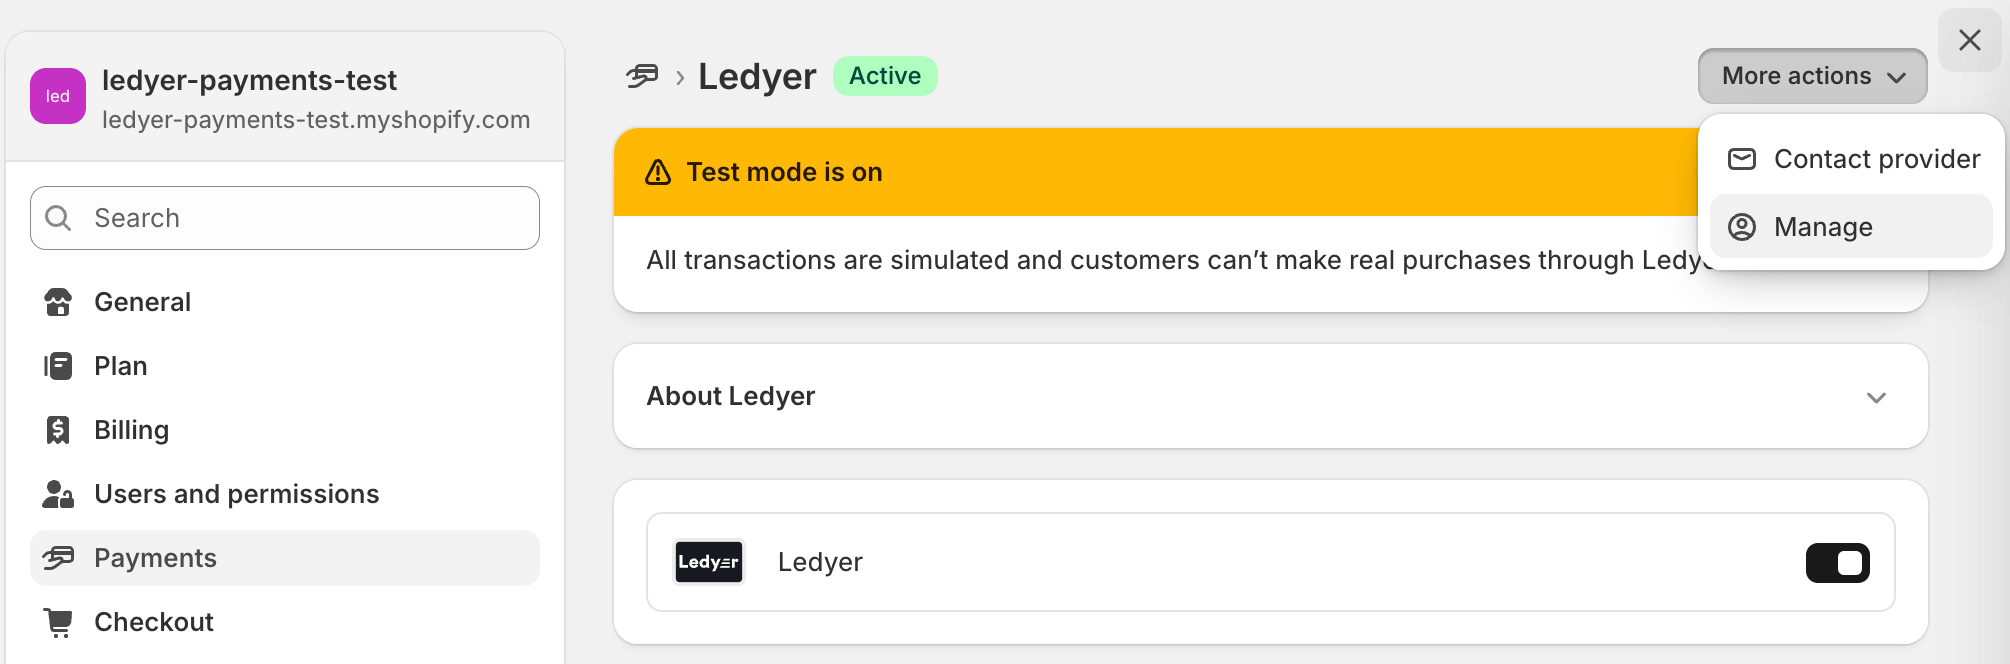
- Navigate to Options > Payments > Click on Ledyer > More actions > Manage
- Set Environment to Live.
- Enter the ID and Secret you generated in the previous step in
Live Client IDandLive Client Secret. - Enter the URL to your shop's terms and conditions page.
- Submit
Step 4: Configure Shopify Settings
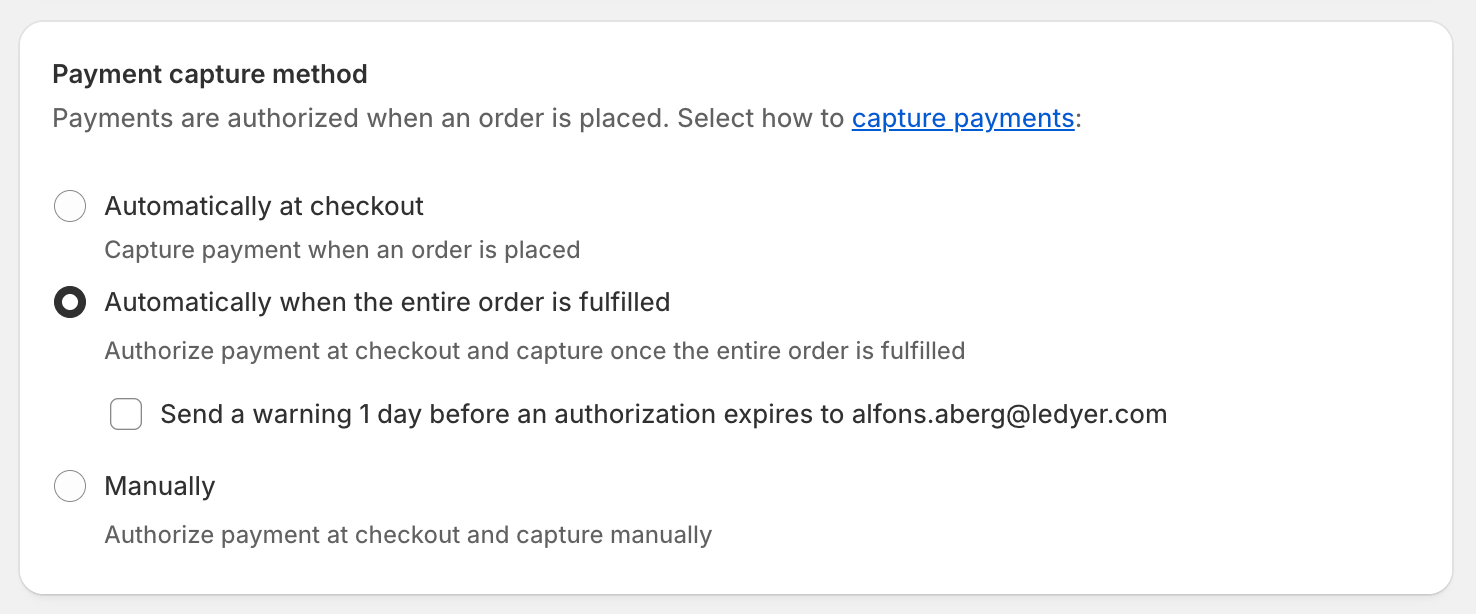
First, we highly recommend setting the Payment capture method as follows; it can be found under Settings > Payments.
Next, there are a couple of settings that can be found under Settings > Checkout. These are not required, but we strongly recommend the following for optimal integration.
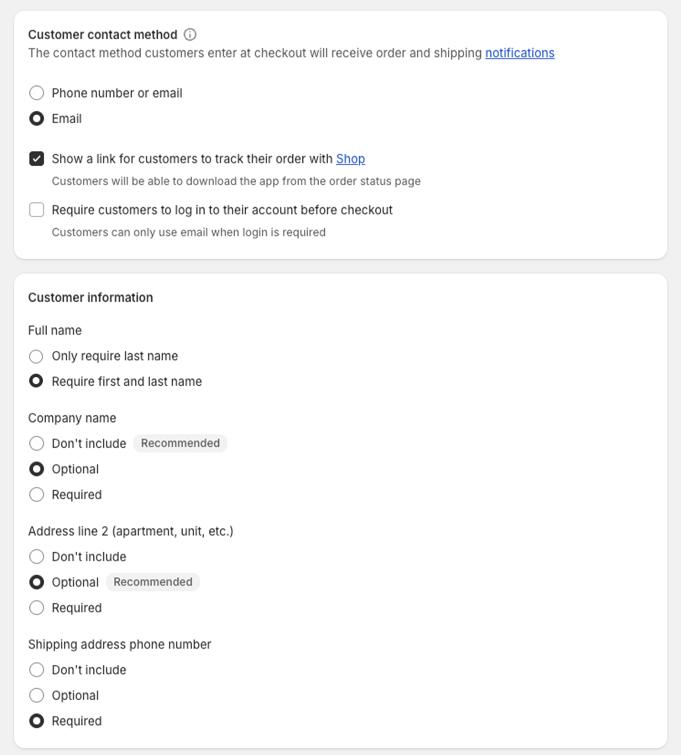
- Always collect the email - we'll collect it in Ledyer Payments otherwise, but keep this setting for the best customer experience
- Require both first and last name
- Company name isn't necessary as this information will be collected more easily inside Ledyer Payments
- Always allow your customer to be as precise as possible with address information
- Shipping address phone number will be used as backup contact information if the email bounces
Sandbox Environment
If you are not setting up a test environment you can skip this step.
Use Ledyer's sandbox environment for testing. You can use any company and contact information - no real orders will be created and no money will be involved. Just remember that the email you use will receive test data.
- Generate sandbox client ID and secret in our sandbox merchant portal
- Set your environment to Sandbox
Always test your integration thoroughly in sandbox mode before going live. Pay special attention to order status synchronization - ensuring orders stay in sync between Shopify and Ledyer's merchant portal.
Going Live
Pre-Launch Checklist
- Environment is set to Live
- Live Client ID and Live Client Secret are configured
Now Activate Ledyer Payments under Settings > Payments > Ledyer
- Successful purchase has been tested
Support and Resources
Getting Help
If you run into issues during setup, reach out to merchant@ledyer.com.
Required Information for Support
When contacting support, please provide:
- Shopify store URL
- Detailed description of the issue
- Screenshots or error messages
- Test transaction details (if applicable)
Need help with your Shopify integration? Contact our integration specialists for personalized assistance with your B2B payment setup.